Mastering Guard Post tactics demands strategic precision. Position your Guard Post near key defensive structures to distract and disrupt attackers. Pair troops like Sneaky Archers with defensive units to create layered barriers. On offense, prioritize swift elimination of Guard Post troops using Bombers' splash damage and Baby Dragons. Upgrading your Guard Post not only enhances its durability but also synergizes with other defenses, creating a formidable stronghold. Effective placement lures enemies into traps, maximizing your base's defensive potential. Understanding these nuances will greatly elevate your defensive and offensive strategies. Continue exploring, and you'll uncover even deeper insights.
Key Points
- Position Guard Post near defensive buildings to maximize troop synergy and protection.
- Upgrade Guard Post to boost durability and enhance overall defensive capabilities.
- Deploy Guard Post troops to lure attackers into core defenses, disrupting enemy strategies.
- Use Raged Barbarians and Bombers to create distractions and exploit splash damage.
- Pair Sneaky Archers with Guard Post troops for effective layered defense.
Offensive Strategies
When engaging in offensive strategies against a Guard Post, understanding the dynamics of troop targeting is essential. Prioritize eliminating Guard Post troops swiftly to prevent them from disrupting your attack.
Leverage air units like Baby Dragons to neutralize ground-based threats such as Raged Barbarians, guaranteeing your ground forces remain unimpeded.
Utilize Bombers' splash damage to efficiently clear both Guard Post troops and nearby structures, enhancing overall troop synergy.
Deploy Raged Barbarians for their speed and expendability, effectively distracting and dismantling Guard Post defenses.
Be cautious with Sneaky Archers; their cloaking can bypass distractions, requiring precise target prioritization.
For additional strategies, deploying Archers strategically can help achieve one-star victories and efficient cleanup operations.
Mastering these tactics assures a streamlined offensive, turning potential chaos into calculated victory.
Defensive Strategies
Positioning the Guard Post strategically near defensive buildings plays an essential role in your base's defense. Effective placement tactics involve situating the Guard Post to lure attackers into the range of high-damage defenses like the Crusher. This maximizes the damage output while minimizing the risk to core structures.
Use troop combinations like Sneaky Archers to compel enemies to target walls, delaying their advance and giving your defenses more time to react. Pairing Guard Post troops with nearby defensive units guarantees a strong response to varied threats. Remember, the goal is to create a layered defense that disrupts enemy strategies, buys necessary time, and channels attackers into kill zones. Master these tactics to fortify your base.
Upgrade Differences
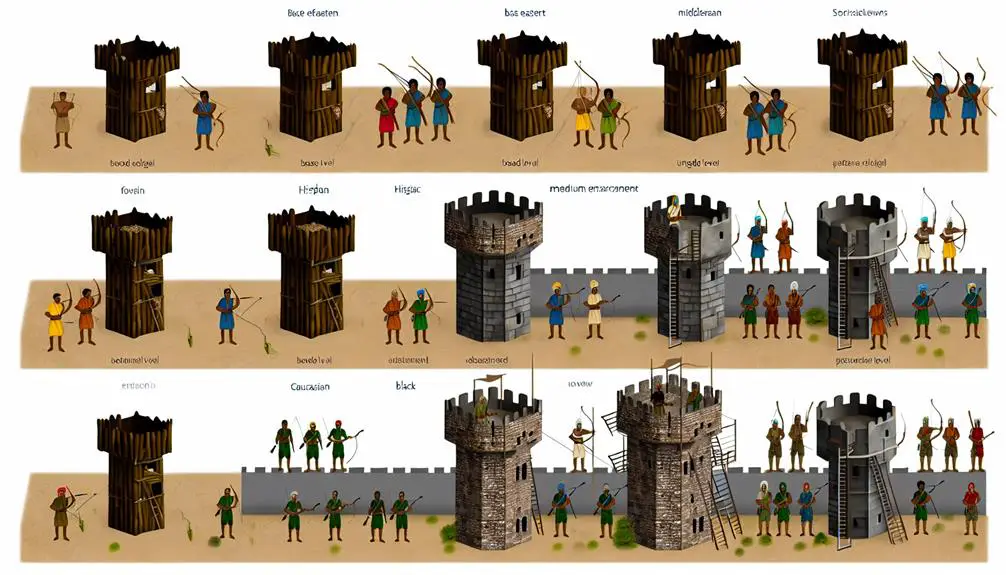
As you progress through the game, upgrading the Guard Post becomes essential for enhancing your base's defensive capabilities. Each upgrade not only provides tactical benefits but also contributes to the Guard Post's visual evolution. Levels 3, 4, 5, 6, 9, and 10 showcase significant design changes, such as the addition of metal reinforcements and stone stairs, which offer appearance enhancements reflecting increased durability.
These upgrades also synergize with other defensive buildings like the Archer Tower and Hidden Tesla, creating a more formidable defense network. Upgrade benefits include improved troop deployment and distraction capabilities. These enhancements can lure enemy units into strategic kill zones, maximizing your defensive potential.
The transformation from a simple hut with a blue roof to a fortified structure underscores the importance of continued evolution, ensuring your base remains resilient against escalating threats.
Key Statistics
The Guard Post's key statistics are crucial for understanding its role in your defensive strategy. Focus on troop interactions and defensive placement.
The number and levels of Guard Post troops depend on your Builder Hall level, influencing how effectively they can distract and redirect enemy troops. Proper placement ensures these troops lure attackers into the range of core defenses. Resource management is essential; upgrading requires both resources and a free Master Builder or O.T.T.O.
Use instant upgrades like Hammers of Building or Books of Building to enhance your Guard Post quickly. Monitoring hit points and troop levels allows for timely upgrades, maintaining your defensive edge. Leverage these statistics for best defensive capabilities.
Interesting Trivia
Surprisingly, Guard Post troops feature distinct blue health bars, setting them apart from Clan Castle troops and Heroes in the Home Village, whose health bars are purple. This unique feature aids in quick identification during battles, an essential aspect of game mechanics.
Did you know a second Guard Post was planned for Builder Hall 7 but got removed? Also intriguing, Guard Post troops adjust their positions when nearby structures move. This subtle movement can tactically shift the battlefield dynamics.
Additionally, their range matches the normal sight range of a Sneaky Archer and a Raged Barbarian, offering strategic advantages. Mastering these nuances can greatly enhance your defensive strategies, making your base more resilient against enemy attacks.
Frequently Asked Questions
How Do Guard Post Troops Interact With Traps and Obstacles?
Coincidentally, Guard Post troops often trigger traps and obstacles, disrupting enemy trap strategies. You can optimize defensive positioning and attack coordination by strategically placing these troops, ensuring they activate traps at pivotal moments, hindering enemy advances effectively.
Can Guard Post Troops Be Manually Controlled During a Battle?
No, you can't manually control Guard Post troops during a battle. Their effectiveness relies on smart positioning strategies, ensuring they engage enemies at best points to maximize defensive benefits and disrupt enemy offensives effectively.
What Happens if a Guard Post Is Destroyed During an Attack?
When your Guard Post is destroyed during an attack, emergency reinforcements cease, leaving your base vulnerable. Defensive strategies will be compromised, halting the counterattack planning. The repairing process must start quickly to restore defensive capabilities.
Do Guard Post Troops Receive Any Buffs From Nearby Structures?
Guard Post troops don't receive direct structure buffs. However, placing them strategically enhances guard post synergy with nearby defensive buildings, maximizing damage and distracting enemies. Focus on positioning to leverage defensive advantages rather than innate buffs.
Are There Any Special Tactics for Using Guard Post Troops Against Air Units?
You can optimize Guard Post synergy by placing air unit counters like Archer Towers and Firecrackers nearby. This setup guarantees Guard Post troops distract ground units while defenses target air threats effectively, maximizing your base's defensive potential.
